Hire SelfService Users
This window allows for users of Employee Self Service to be created.
Rules and Guidelines
- This information can be viewed and maintained on the Define Users window.
- Payroll Templates and Access Profiles can be applied from this option.
- The information entered on this window affects how the employee logs into Self Service and to which template and profile they are attached to.
Field Information
This is used to identify whether the user is Standard (for Preceda or MSS Users) or Employee (ESS Users).
Select from the drop-down the ID number of the employee you want to give access to.
This can create User Names of up to 80 characters.
This field has been developed to accommodate the use of email addresses as User Names. Although Users will login to Preceda/Self Service with their Login User Name, an auto-generated Application User Name will be stored against each User Profile. All Preceda processing jobs will run under the Application User Name.
This is an auto-generated User Name that will be stored against each User Profile. This is auto-created when this record is saved, and is used to identify the User in all processes and audit reports.
The Application User Name will also be seen in the top right corner of the window after the Help menu. The drop-down arrow beside this User Name can be used to logoff from Preceda, or to change the User's password. By hovering the mouse pointer over this User Name, the Login User Name will be displayed.
This is the status of this User Profile.
| Code | Description |
|---|---|
| Enabled | This user profile is enabled and can be used to access Self Service. |
| Disabled |
This user profile is disabled and cannot be used,to access Self Service. |
An expiry date on the password can be entered.
When ticked, a mandatory password text box will be displayed to allow the user to assign a manual password to the user being created.
- When the user un-ticks the checkbox before saving the information on the screen, the new user will be created and the automated password will be displayed on the screen or sent along with other login details to the new user's registered email address.
-
In case the user has keyed a new password in the password field and then un-ticked the checkbox, the password field will disappear on the screen and the automated password process will be followed.
- If the user being created is assigned with an email address username or has a business email address registered and the password has been overridden, the login details will be sent to the existing email address using the manually provided password.
- If a new password has been assigned to a new user with no registered email address, the password will not be displayed on the screen. The system will only save the new user information as the user who performed the new user creation knows the password that has been created.
Having the "Override automated password" checkbox ticked, this field will be made available and it is mandatory.
This is the Group Profile to be attached to this user.
For an existing user, this field displays the Access Profile attached to this user.
- When initially setting up a user, leave this field blank. This field is mandatory.
- This field should not be used for maintenance. Use the Define Access Profiles window to alter an Access Profile.
Enter the Business Email Address you want to use for email notifications. Preceda will send the login details to this email upon user creation.
If this field is populated, an email will be automatically sent to the Business Email Address advising the User of the login details. If the this field is empty and the Login User Name contains an '@', it will then be assumed that this User Name is an email address, and the new User notification email will be sent to this address.
A Preceda Variable option has been provided to disable the email, if needed. This feature is controlled by Preceda Variable *USER_CREATION_OPTS. By default this will be set to Y so that these emails will be sent. By request, this setting can be changed to N so that emails will not be sent to the User.
- In cases where this setting is not enabled or no Business email is found for the User, the password will still be auto-generated, and instead of sending an email notification, the Password will be provided in an on-window display window:
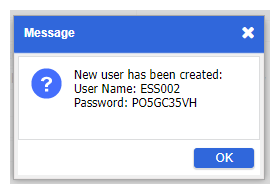
-
If the password is not recorded before this window is closed, you will need to use the Reset User window to apply a password of your choosing.
Enter the personal email of the employee, if desired. This information is used for recording purposes only; Preceda will not send the login details or any other automatic correspondence to this email if the Business Email field is left blank.
Select Next >> to move to the Time Management window or the Super Guarantee window.
Select << Back to return to the Tax File Number Declaration window.